Experience the Ultimate Hike Grand Canyon Rim to Rim
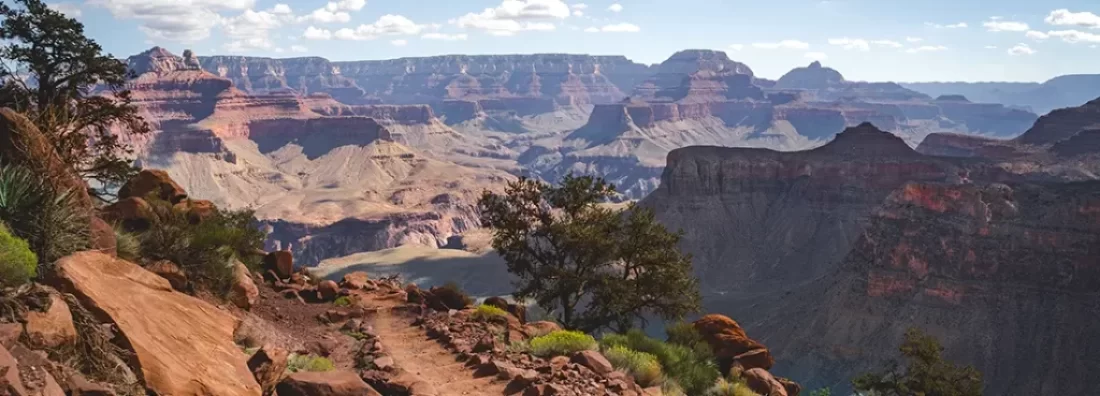
Grand Canyon rim-to-rim hike is a bucket list adventure that calls to outdoor enthusiasts worldwide. This epic journey takes you from one side of the canyon national park to the other, traversing some of the most breathtaking landscapes on Earth.
But don’t be fooled by the stunning vistas – hiking the Grand Canyon rim to rim is no walk in the park. It’s a challenging trek that demands careful planning, physical preparation, and respect for the unforgiving desert environment.
As someone who’s tackled this incredible hike multiple times, I can tell you it’s an experience that will push you to your limits and leave you in awe of nature’s grandeur. Whether you’re a seasoned hiker or an ambitious beginner, the rim-to-rim journey offers a peaceful experience to immerse yourself in the heart of one of America’s most iconic national parks.
Table of Contents
Choosing Your Rim-to-Rim Route
When planning your rim-to-rim hike, you have two main options: South Rim to North Rim or North Rim to South Rim. Each route has its own unique characteristics and challenges. Let’s break them down:
South Rim to South Kaibab Trail
This is the most popular route for rim-to-rim hikers, and for good reason. Starting from the South Rim offers several advantages:
- Easier access: The South Rim is more developed and easier to reach, with more lodging and transportation options.
- Shorter distance: The South Kaibab Trail to North Kaibab Trail route is about 21 miles long.
- Stunning views: The initial descent offers breathtaking panoramas of the canyon.
However, this route also comes with some challenges:
- Steeper initial descent: The South Kaibab Trail drops quickly, which can be hard on your knees.
- Less shade: The upper portions of the trail offer little protection from the sun.
- No water on the South Kaibab Trail: You’ll need to carry all your water for the first 7 miles.

Floating Grand Canyon Graphic Hoodie
Grand Canyon Graphic is design for excursion as a Rim to Rim Backpacking Trip. A UPF-50 Graphic Hoodie, wicking and a sewn in facemask for added sun protection,
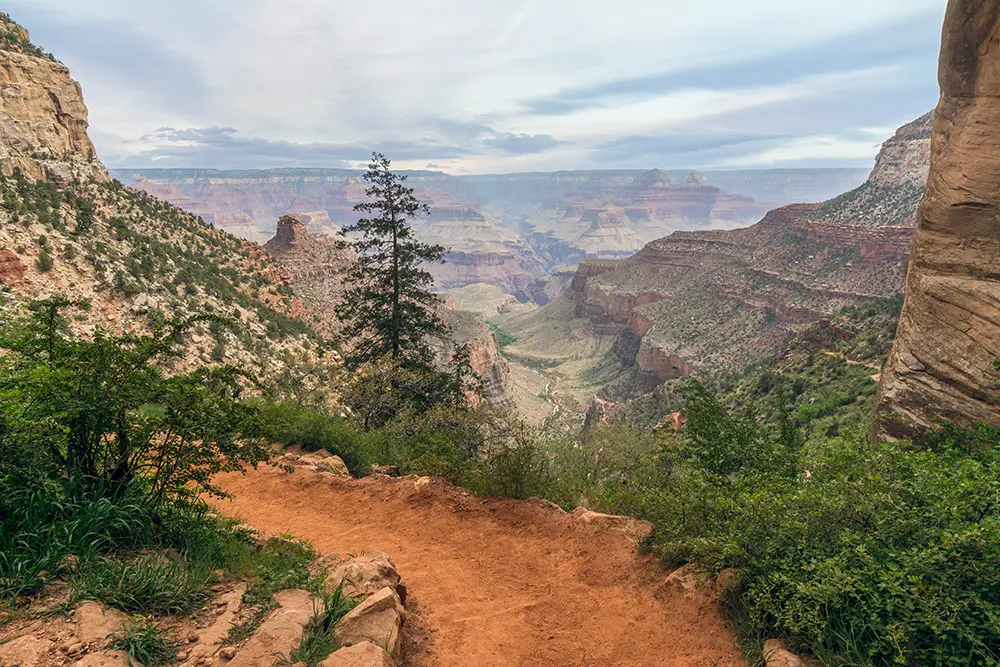
Rim to Rim Trail View
I believe in sun protection and it has to be comfortable and functionable, or it’s worthless. Our sun gloves are a UPF-50 and you can operate a camera to tying on a fly. Also a great driving glove.

North Rim to South Rim
While less common, the North Rim to South Rim route has its own appeal:
- More gradual descent: The North Kaibab Trail offers a more gentle initial drop.
- Cooler temperatures: The North Rim is about 1,000 feet higher in elevation, providing a cooler start. You will experience the higher altitude as you ascend to the more desert-feeling south rim.
- Less crowded: You’ll encounter fewer hikers, especially in the early miles.
But keep in mind:
- Longer distance: This route is about 24 miles via the Bright Angel Trail. This longer distance making it important to pack accordingly.
- Limited services: The North Rim has fewer amenities and a shorter operating season.
- Tougher climb out: You’ll face a steeper ascent in the final miles to the South Rim.
Personally, I prefer the South to North route for first-time rim-to-rim hikers. The logistics are easier to manage, and there’s something magical about finishing your hike in the more serene environment of the North Rim. If you are a fit hiker and pressed for time, I highly recommend the South Kaibab option, as it offers a shorter distance and breathtaking views.
Best Time to Hike Grand Canyon Rim to Rim
Timing is crucial when planning to hike Grand Canyon rim to rim. The extreme desert climate means that conditions can be dangerously hot in summer and impassably snowy in winter. Here’s a breakdown of the best times to tackle this epic trek:
Spring (May to early June)
This is one of the ideal windows for a rim-to-rim hike. Temperatures are generally moderate, and the North Rim facilities open around May 15th. However, be prepared for potential lingering snow on the North Rim and cool nights.
Fall (late September to mid-October)
Another prime time for the rim-to-rim hike. Fall offers pleasant temperatures and stunning autumn colors. Just keep in mind that North Rim services begin to close in mid-October.
Physical Preparation for Your Rim-to-Rim Adventure
Hiking Grand Canyon rim to rim is no small feat. The journey involves over 5,000 feet of elevation gain and 21-24 miles of rugged terrain. Proper physical preparation is essential for your safety and enjoyment. Here’s how to get ready:
Cardiovascular Endurance
Build your stamina with activities like:
- Long-distance hiking
- Running or jogging
- Cycling
- Swimming
Aim to work up to exercises that last 6-8 hours, similar to the duration of your rim-to-rim hike.
Strength Training
Focus on exercises that target hiking-specific muscles:
- Squats and lunges for leg strength
- Step-ups to mimic climbing stairs
- Core exercises for stability
- Upper body workouts for carrying a backpack
Practice Hikes
The best preparation is to do challenging hikes that simulate the conditions you’ll face in the Grand Canyon. These hikes will help you gauge your fitness level and get used to long days on the trail. Some great training hikes include:
- Mt Tallac in Northern California (10 miles, 3,200 feet elevation gain)
- San Bernardino Peak (16.5 miles, 4,700 feet elevation gain)
- San Gorgonio Peak (18 miles, 5,800 feet elevation gain)
- Mount Yale (9 miles 4500 feet elevation gain)
Altitude Acclimation
Both rims of the Grand Canyon sit at over 7,000 feet elevation. If you’re coming from a lower altitude, give yourself a day or two to acclimate before starting your hike. You will experience a change going from the higher altitude pine forest of the North Rim to the desert-feeling South Rim. This will help prevent altitude sickness and improve your performance. Spend time in the altitude pine forest to acclimate.
Remember, the rim-to-rim hike is as much a mental challenge as a physical one. Training builds not just your body, but also your confidence and mental toughness.
Essential Gear for Your Rim-to-Rim Hike
Proper equipment can make or break your rim-to-rim experience. Here’s a rundown of the gear you’ll need to safely and comfortably hike the Grand Canyon from rim to rim:
Footwear
Your feet are your most important tool on this hike. Invest in:
- Well-broken-in hiking boots or trail running shoes
- Moisture-wicking socks (bring extras)
- Blister prevention patches
Clothing
Dress in layers and choose moisture-wicking fabrics:
- Lightweight, breathable hiking pants or shorts
- Moisture-wicking t-shirts or long-sleeve shirts
- Insulating layer (fleece or light puffy jacket)
- Rain jacket
- Sun hat
- Bandana or buff (great for cooling off)
Backpack
A comfortable daypack with a capacity of 20-30 liters should suffice for most hikers. Make sure it has:
- Comfortable shoulder straps and hip belt
- Multiple pockets for organization
- Hydration system compatibility
Hydration
Staying hydrated is crucial in the desert environment. Bring:
- At least 3 liters of water capacity (I prefer Smartwater Bottles) w/ Sawyer filter system
- Electrolyte tablets or powder
- Sawyer Water filter for refilling from streams
Food
Pack calorie-dense, easily digestible foods:
- Energy bars and gels
- Trail mix and dried fruits
- Jerky or other protein sources
- Electrolyte-rich snacks
Navigation
While the corridor trails are well-marked, it’s always good to have:
- National Geographic’s Grand Canyon trail map
- Compass
- GPS device or smartphone with offline maps
Safety Equipment
Don’t forget these essential safety items:
- First aid kit
- Emergency shelter (like a lightweight bivy sack)
- Headlamp with extra batteries
- Sunscreen and lip balm
- Sunglasses
- Knife or multi-tool
- Emergency whistle
Remember, every ounce counts when you’re carrying your pack for 20+ miles. Choose lightweight, multi-purpose gear when possible, but don’t skimp on essentials.
Planning Your Rim-to-Rim Itinerary
Successfully hiking Grand Canyon rim to rim requires careful planning. Here are some popular itinerary options and tips for making your arrangements:
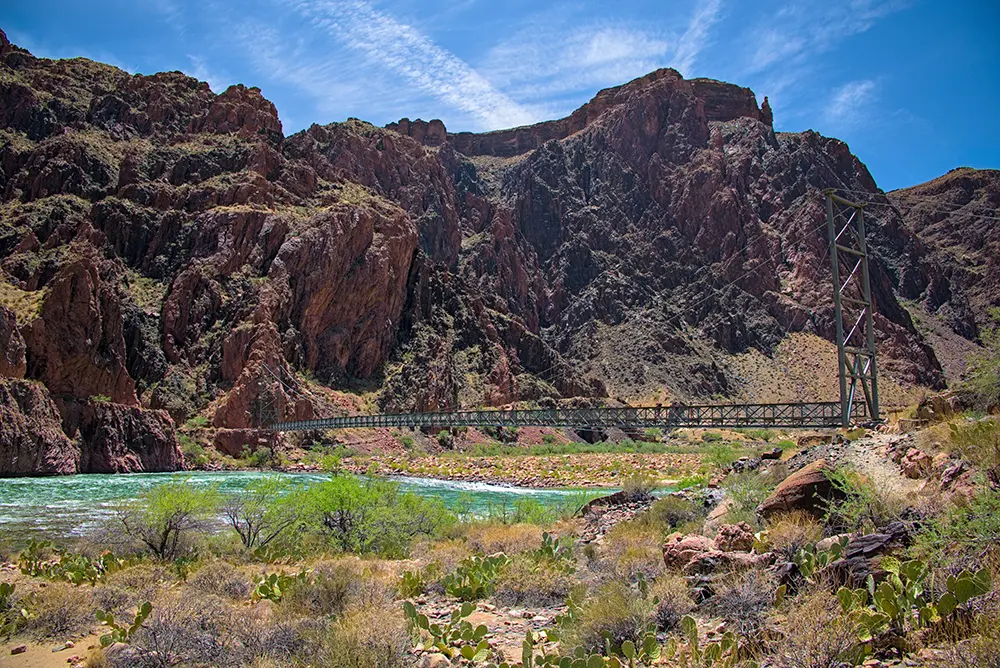
Colorado River Grand Canyon
Or if you are the type, that like to match. The perfect combo, A Salmonfly Graphic Hoodie and matching Patterned Leggings. I like the leggings, since I like to wear a Kilt on long treks. Patterned Leggings are a great addition.

One-Day Rim-to-Rim Hike
This is the most challenging option, suitable only for very fit and experienced hikers. If you choose this route:
- Start before dawn to avoid the heat of the day
- Plan for 12-15 hours of hiking time
- Arrange a shuttle back to your starting point
Two-Day Rim-to-Rim with Phantom Ranch Stay
This popular option breaks the hike into two more manageable days:
- Day 1: Hike from one rim to Phantom Ranch (14-16 miles)
- Overnight at Phantom Ranch
- Day 2: Hike from Phantom Ranch to the opposite rim (7-10 miles)
Phantom Ranch is notoriously difficult to book. Reservations open 15 months in advance through a lottery system.
Three-Day Rim-to-Rim with Camping
For a more relaxed pace, consider this itinerary:
- Day 1: Hike to Bright Angel Campground (7-9 miles)
- Day 2: Hike to Cottonwood Campground (7-8 miles)
- Day 3: Hike to the opposite rim (7-8 miles)
This option requires a backcountry permit, which can be challenging to obtain during peak seasons.
Shuttle Services
Unless you’re doing a round-trip hike, you’ll need to arrange transportation between the rims. Trans-Canyon Shuttle offers daily service between the South and North Rims during the high season. Book well in advance, as seats fill up quickly.
Lodging
If you’re not camping, book your lodging options early. Options include:
- South Rim: Several lodges within the park and hotels in nearby Tusayan
- North Rim: Grand Canyon Lodge or the campground
Permits and Fees
While you don’t need a permit for day hiking, you will need one for any overnight stays in the canyon. The park charges an entrance fee of $35 per vehicle, or you can use an America The Beautiful National Parks Pass.
Remember to check the park’s backcountry updates page for any trail closures or conditions that might affect your hike.
Water and Nutrition Strategies
When you hike Grand Canyon rim to rim, proper hydration and nutrition are not just important – they’re literally lifesaving. The arid environment and strenuous nature of the hike demand careful attention to what you consume. Here’s how to stay fueled and hydrated:
Hydration is Key
Dehydration is a serious risk in the canyon, so staying ahead of your thirst is essential. Drink plenty of water before, during, and after your hike. Aim to drink about a liter of water every 2 hours while hiking.
Here are some additional hydration tips:
- Carry electrolyte tablets or powder to replenish lost minerals through sweat.
- Consider using a hydration system with a drinking tube, which makes it easier to drink on the go.
- Refill your water bottles at every opportunity, such as at rest stops with potable water.
Nutrition for the Long Haul
You’ll be burning a lot of calories on the rim-to-rim hike, so it’s crucial to fuel your body properly. Eat a hearty breakfast before you start, and pack plenty of calorie-dense snacks to eat throughout the day.
Focus on foods that provide sustained energy, such as:
- Energy bars and gels: These provide a quick and easy source of carbohydrates.
- Trail mix and dried fruits: A mix of nuts, seeds, and dried fruits offers a good balance of carbohydrates, protein, and healthy fats.
- Jerky or other protein sources: Protein helps repair muscle tissue after exertion.
- Electrolyte-rich snacks: These help replenish electrolytes lost through sweat.
Meal Planning
If you’re camping, plan your meals in advance and pack accordingly. Consider bringing a lightweight stove to heat water for dehydrated meals or hot drinks. Remember to pack out all trash, including food scraps.
If you’re staying at Phantom Ranch, you’ll have the option to pre-order meals. This can be a welcome treat after a long day of hiking. Just be sure to book your meals well in advance, as they often sell out.
Safety Considerations for Your Rim-to-Rim Hike
Hiking Grand Canyon rim to rim is an inherently challenging and potentially risky endeavor. The desert environment, rugged terrain, and remoteness of the canyon demand that you prioritize safety at all times. Here are some crucial safety considerations to keep in mind:
Heat Exhaustion and Heat Stroke
The extreme heat in the canyon can quickly lead to heat-related illnesses. Heat exhaustion is characterized by symptoms such as heavy sweating, headache, dizziness, and nausea. Heat stroke, a more serious condition, occurs when the body’s temperature regulation system fails, resulting in a high body temperature, confusion, and even loss of consciousness.
To prevent heat-related illnesses:
- Hike during the cooler months or shoulder seasons.
- Start your hike before dawn to avoid the hottest part of the day.
- Take frequent breaks in the shade.
- Drink plenty of water and electrolytes.
- Wear loose-fitting, light-colored clothing.
- Know the symptoms of heat exhaustion and heat stroke, and seek medical attention immediately if you experience them.
Lightning Storms
Thunderstorms can develop rapidly in the canyon, especially during the monsoon season (July to September). Lightning poses a serious threat to hikers on exposed trails.
If a thunderstorm threatens:
- Seek shelter immediately in a designated lightning shelter or a low-lying area away from tall objects.
- Avoid caves, as they can channel lightning strikes.
- Spread out from other members of your group.
- Wait at least 30 minutes after the last clap of thunder before resuming your hike.
Water Safety
While the Colorado River may look inviting, it’s important to remember that it’s a powerful and unforgiving force. Drowning is a real danger, even for strong swimmers.
Follow these water safety tips:
- Never attempt to swim across the Colorado River.
- Stay a safe distance from the edge of the canyon rim and trails.
- Supervise children closely at all times near water.
- Be aware of slippery rocks near water sources.
Wildlife Encounters
The Grand Canyon is home to a variety of wildlife, including elk, deer, bighorn sheep, and even mountain lions. While encounters with large animals are rare, it’s important to know how to react if you do encounter wildlife.
- Never approach or feed wildlife.
- Store food properly to avoid attracting animals to your campsite.
- If you encounter a dangerous animal, such as a mountain lion, stay calm and slowly back away. Make yourself appear larger by raising your arms, and make noise.
Leave No Trace
It’s essential to minimize your impact on this fragile environment. Pack out all trash, including food scraps and toilet paper. Stay on designated trails to avoid trampling vegetation. And remember to leave what you find so that others can enjoy the canyon’s natural beauty.
Additional Safety Tips
- Hike with a partner or in a group whenever possible.
- Let someone know your itinerary and expected return time.
- Carry a map, compass, and GPS device, and know how to use them.
- Check the weather forecast before you go.
- Be prepared for emergencies by carrying a first aid kit, emergency shelter, and other essential gear.
Additional Tips for a Successful Rim-to-Rim Hike
Here are a few extra tips to help make your Grand Canyon rim-to-rim hike as memorable and enjoyable as possible:
Start Early
Whether you’re hiking in a single day or over multiple days, it’s always a good idea to get an early start. This will allow you to beat the heat of the day, have more time to enjoy the views, and avoid afternoon thunderstorms.
Pace Yourself
The rim-to-rim hike is a marathon, not a sprint. Pace yourself accordingly, especially on the uphill sections. Take breaks when you need them, and listen to your body.
Layer Up
Temperatures in the canyon can fluctuate dramatically throughout the day. Be prepared for a variety of conditions by dressing in layers. This will allow you to adjust your clothing as needed.
Protect Yourself from the Sun
The sun is intense in the canyon. Wear a hat, sunglasses, and sunscreen with an SPF of 30 or higher. Reapply sunscreen frequently, especially if you’re sweating.
Bring Trekking Poles
Trekking poles can be incredibly helpful on the rim-to-rim hike, especially on the steep descents and ascents. They can help reduce strain on your knees and provide extra stability on uneven terrain.
Take Advantage of Rest Stops
There are several rest stops along the corridor trails, offering potable water and restrooms. Take advantage of these opportunities to refill your water bottles, use the restrooms, and rest your legs.
Enjoy the Journey
The Grand Canyon is a truly awe-inspiring place. Take the time to soak in the views, appreciate the natural beauty, and create memories that will last a lifetime.
Conclusion of Hike Grand Canyon Rim to Rim
The Grand Canyon rim-to-rim hike is an epic adventure that will challenge you physically and reward you with unforgettable experiences. By choosing the right route, preparing adequately, and following these tips, you’ll be well on your way to conquering this bucket list adventure. Remember to respect the canyon’s power, pack accordingly, and savor every step of this journey through one of America’s most iconic national parks.
